
ZIRCONIA SHADE-TAKING
ANTERIOR - Vita Linearguide 3D MASTER
Valueguide - Chromaguide
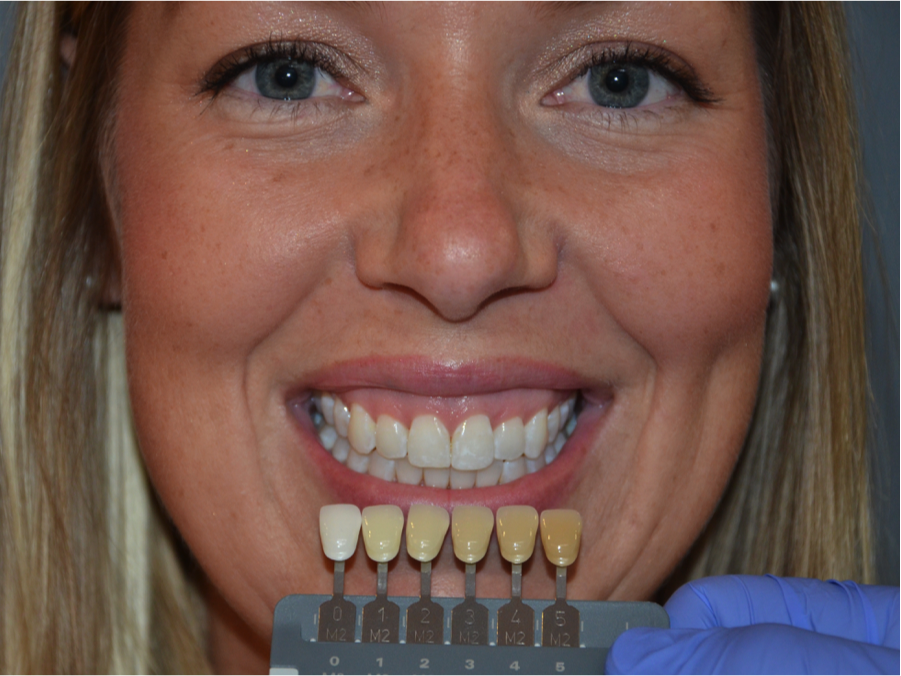
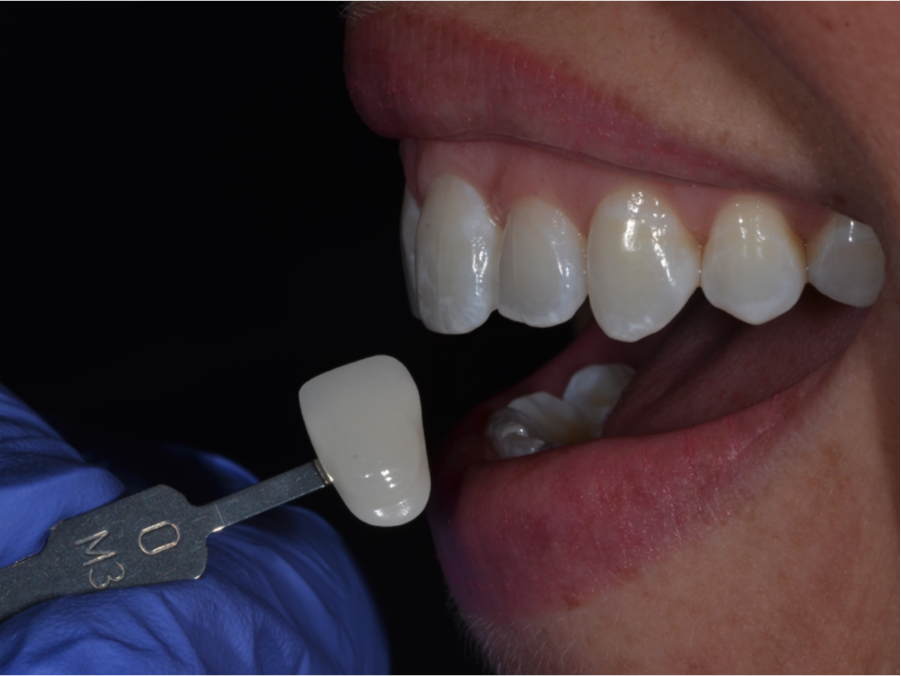
1. Value (light or dark of target tooth) |
2. Closer (value photo) |
|
Full face photo ALWAYS has the patient standing up level to the earth with a full smile and hydrated teeth. Use Vita Linearguide 3D- Master Guide with closest value tab next to target tooth. Value is simply how light or dark the target tooth is and the most important part of shade communication. ALWAYS, squint your eyes and tilt the incisal edge of shade tab toward the teeth to avoid camera flash glare in center of tab. The technician may use this photo to verify accuracy of face-bow, determine midline problems or evaluate contour based on bow of lower lip. See 3D value guide tips in attachment below. ALWAYS confirm shade information on RX.
|
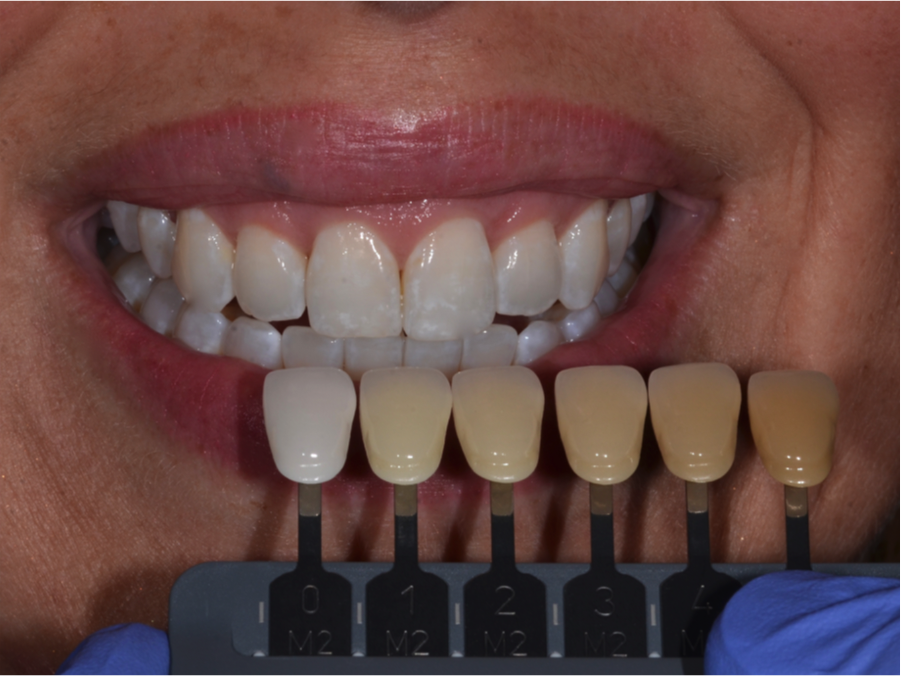
Now zoom in and with your eyes squinted, place the two closest value tabs near the target tooth and take the photo. A skilled ceramist can lightly alter the value to better match the target tooth when value tab is not perfect. ALWAYS write desired value tabs and other notes on the RX.
|

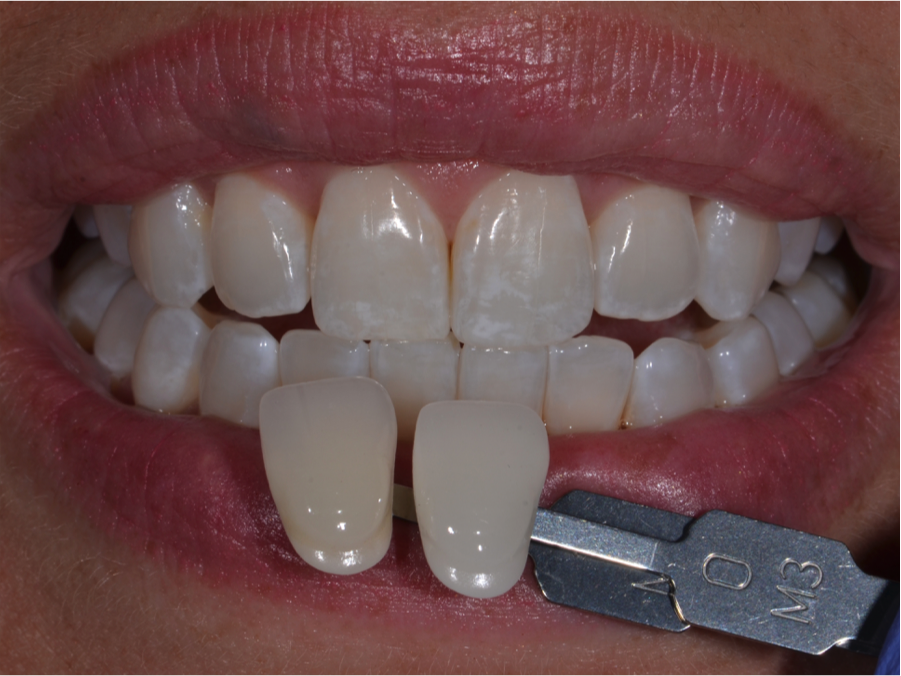
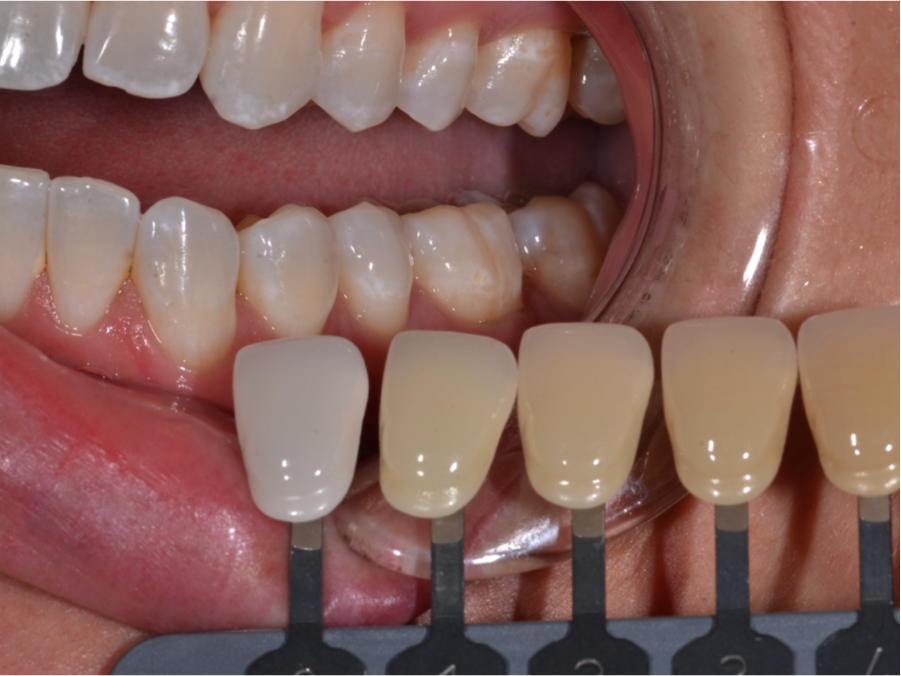
3. Chroma (amount of color)This photo is for the color or the amount of color in the target tooth. With eyes wide open, under color corrected or natural light, use the chroma/hue guide and take a photo of closest guide as seen in photo. See Chroma/Hue Guide attachment below.
|
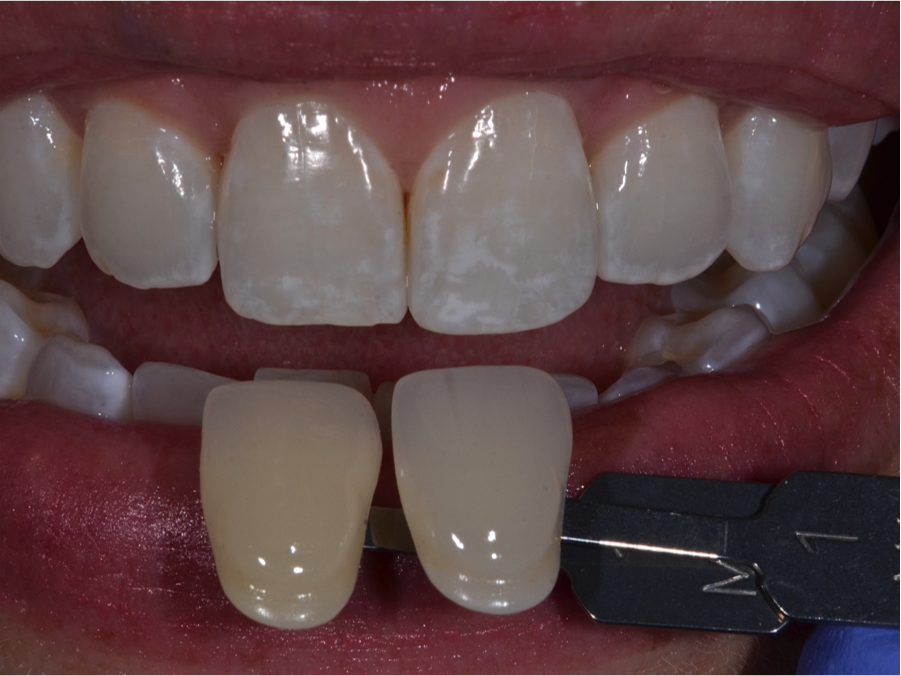
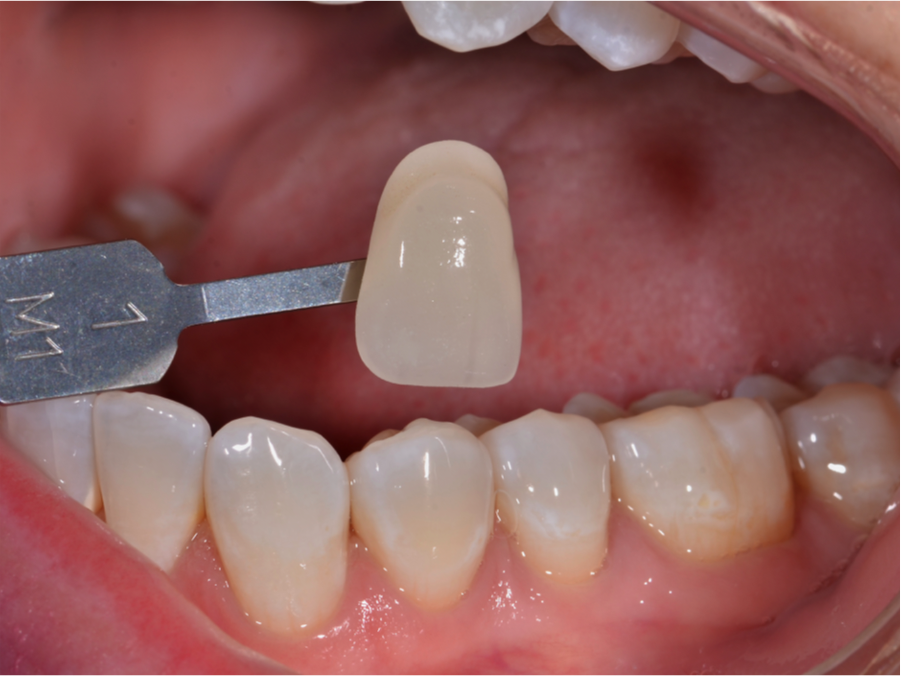
4. Closer ChromaWith mouth slightly open, zoom in and place the two closest color/chroma tabs next to the target tooth and Take the photo. A skilled ceramist can differentiate and correct most differences between these tabs and the tooth. ALWAYS write tab selections and Doctor/ patient desires on RX.
|
5. Edge to EdgeThis incisal edge to edge photo should include the same color/chroma tabs as photo #4. This photo will reveal any difference in incisal edge function between the mouth and the articulator. If the function is visibly different, corrections need to be made!
|
6. Side ViewThis photo illustrates the texture and luster of the tooth surface. This texture is not as visible from the straight on photo and nearly invisible on a stone or plastic model. When the ceramist can match the texture and luster of the natural teeth, the restoration will provide a more life like authenticity. This side angle photo will also help determine the length of the contact by allowing the ceramist to view the interproximal tissue. If the tissue is low in the interproximal, the contact needs to be longer to avoid a dark triangle. If the tissue is full in the interproximal, the contact will be shorter to avoid smothering the tissue.
|
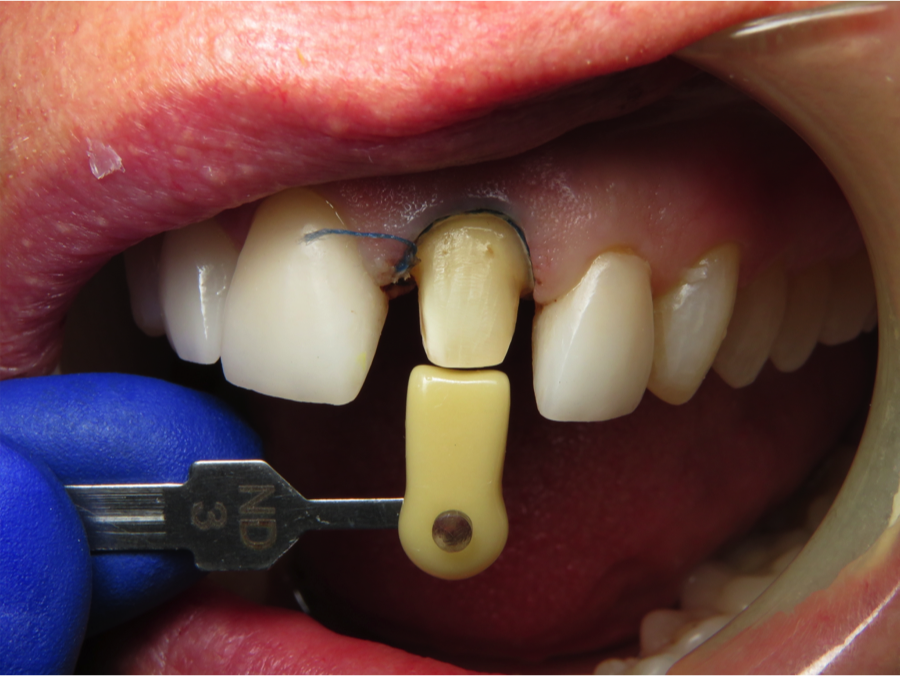
7. Dentin Shades
|
Zirconia and lithium disilicate (e.max) restorations ALWAYS require a shade photo of the re-hydrated dentin. The dentin guide that is most popular is the (Natural Die Material guide) from Ivoclar. Find the shade tab that is the closest match to the hydrated dentin and take your photo from the distance shown above. The closest dentin tab may not be a perfect match, but a skilled ceramist will use this information to block the dark dentin from showing through the restoration. Zirconia works best for darker dentin!
|
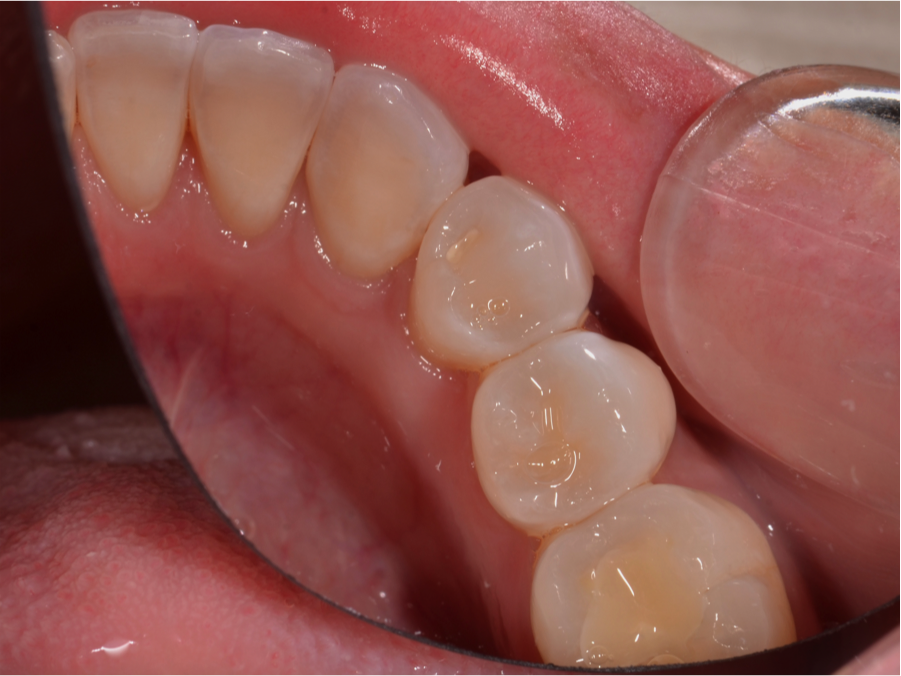
POSTERIOR

1. Value (light or dark of target tooth) |
2. Chroma (amount of color) |
|
Use Vita Linearguide 3D-MasterGuide with closest value tab next to hydrated target tooth. ALWAYS squint your eyes and tilt incisal edge of value tab toward the tooth to avoid camera flash glare in center of tab. Value is the most important information in shade communication. ALWAYS confirm information on RX.
|
This photo is for color and amount of color in the target tooth. With eyes wide open, under color corrected light, use the chroma/hue guide and take a photo of closest chroma tab, next to target tooth as seen in photo.
|
3. Closer Chroma |
4. Occlusal View |
|
Place closest chroma guide in line with target tooth and take photo. ALWAYS confirm chroma/value selections on the RX.
|
This photo illustrates occlusal stain, anatomy or characteristics that may or may not be desired in final outcome. ALWAYS communicate any matching instructions on RX.
|